July 5, 2022
Dryer Repair
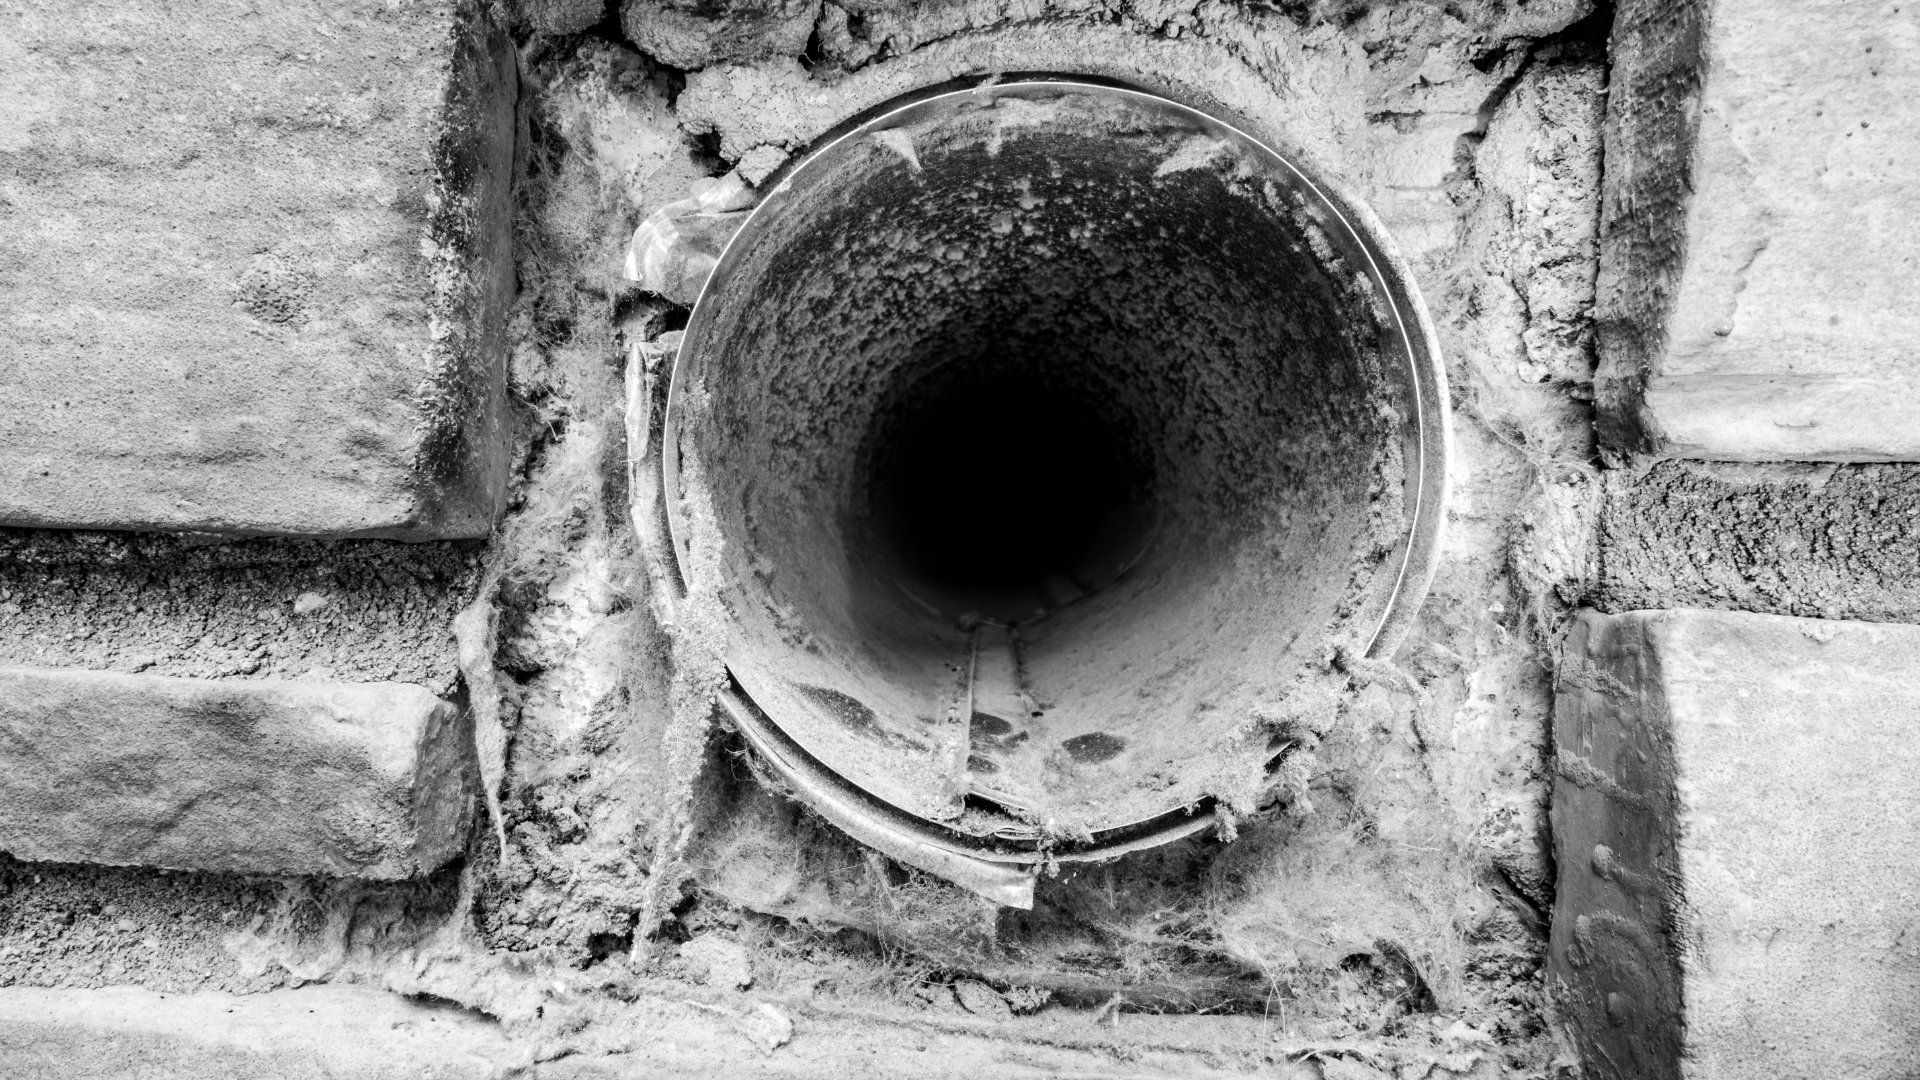
It’s important that you give your dryer vent a proper clean on a regular basis to stop lint and other debris from building up in it. When your vent gets clogged up, it can present a fire risk as well as keep your dryer from working properly, which increases your energy bill.
In this guide, we will give you step-by-step instructions on how to properly clean your dryer vent so that you can keep it clean and running smoothly. Simply start with step one and work your way down the guide until you’ve gone through all the steps.
Our cleaning process requires you to have a vacuum cleaner, a small brush, and a wrench to loosen the clamp on the dryer vent. Once you have those tools, you can get started.
Step 1 – Disconnect the duct.
The first task is to disconnect the duct from the vent so you can access the inside of the duct as well as the vent.
Disconnecting the duct is super simple, all you need to do is:
- Switch the power off to your dryer.
- If you have a gas-powered dryer, turn the gas supply off by closing the main gas valve.
- Pull your dryer out from the wall if possible (you don’t need to do this if it’s bolted to the wall).
- Locate the dryer vent and remove the duct. To remove the duct, you will need to disconnect the clamp by first loosening it up with a wrench and then pulling it off.
- If your duct can be disconnected from the wall end, disconnect that end too.
Step 2 – Clean the vent and duct.
Now that the duct has been disconnected from the vent, the next step is to clean the vent and duct out. The easiest way to do this is to use a vacuum cleaner. If you don’t have a vacuum cleaner, you can use a small brush.
Here’s how to clean the vent and duct:
- Start by removing any lint at the entrance of the vent that has built up there. Lint is best thrown out in your normal household trash can.
- Next, plug your vacuum cleaner in, attach the hose attachment, turn it on, and then vacuum the back of your dryer, followed by the vent. You should be able to get the vacuum deep into the vent so that you can get all the lint out. If you don’t have a vacuum cleaner, clean the vent out with your brush and a cloth if need be.
- Once the vent is clean, use your vacuum cleaner or brush to clean out the duct. If you turn it upright, the lent in it should fall out onto the floor and you can then vacuum it up.
- If you can, clean the part of the vent that goes outside as well. This can also be done with your vacuum cleaner or with a brush. Sometimes, you can also clean the vent from outside of your home at the exit point, but this isn’t usually necessary.
Step 3 – Reconnect the duct.
Now that your dryer vent is nice and clean and free of any lint build-ups, the final step is to reconnect your vent so that you can start using your dryer again. All you need to do is reattach the duct the same way you removed it earlier.
Here’s how to reconnect the duct to your dryer:
- Start by connecting the wall end of the dryer duct. This can be done by putting the duct into position and then securing it with the clamp that you removed earlier.
- Next, reconnect the duct to the dryer and secure it in place with the clamp that you removed earlier.
- Push your dryer back into position.
- Turn the power and/or gas supply back on.
- Start your dryer to make sure it’s working properly.
How to keep your vent clean
To help keep your dryer vent clean so that you don’t have to clean it out too often, here are a few simple tips:
- If you see lint on the outside of your dryer, vacuum it up straight away or use a damp cloth to wipe it. This will stop large deposits of lint from developing, which can block your vent and cause fire hazards.
- Remove the vent duct from your dryer every couple of months and vacuum out any lint.
- After every dryer cycle, remove the lint filter from your dryer and remove any lint from it. This will stop the lint from getting into the vent.

Apr. 09, 2024
Eliminate the Burning Smell From Your Microwave

Apr. 09, 2024
Fixing a Samsung Freezer That Won’t Freeze

Apr. 09, 2024
Whirlpool Oven Won’t Heat: Here’s What To Do

Mar. 06, 2024
Easy Steps to Clean Your Refrigerator Coils

Mar. 06, 2024
Quick Fixes for an LG Dryer Not Heating

Mar. 06, 2024
How to Fix an Electrolux Dryer That’s Not Drying

Feb. 05, 2024
Why Is Your Whirlpool Washer Lock Light Flashing?

Feb. 05, 2024
Why Is Your Freezer Door Not Sealing?

Feb. 05, 2024
How Does a Ventless Dryer Work?

Jan. 03, 2024