August 20, 2018
Oven Repair
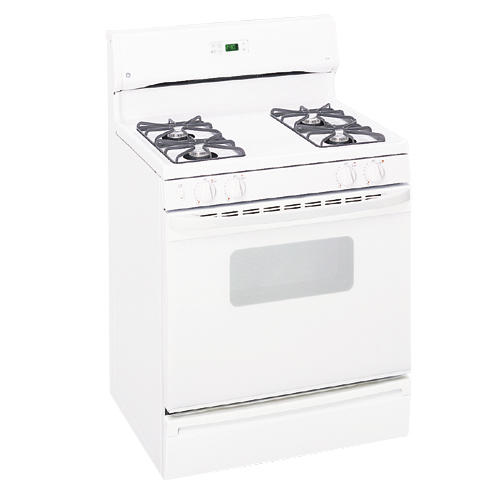
The thermostat in your GE gas oven model JGBC20WEAWW controls the temperature in your appliance. When the desired temperature is reached, the thermostat turns off the heat source. On the other hand, when the temperature begins to fall, the oven thermostat cycles the heat back on. Symptoms of a faulty thermostat vary; however, undercooked food or an oven that won’t turn on or off are the most common signs. If you believe your appliance is suffering from a defective oven thermostat, follow the steps provided below to replace the malfunctioning part.
How to Replace the Thermostat in a GE Oven
Before starting your oven repair, either unplug your appliance or switch it off at the circuit breaker. You must also turn off the gas running to the oven. To protect your hands and eyes during the repair, wear work gloves and safety goggles.
-
Start by taking the grates, the burner caps, and the surface burners off your cooktop. Next, unthread the screws securing the top panel to the range. Using a putty knife, lift up all four igniters and disconnect them from their wires. Insert the putty knife under the main top seam to disengage the retaining clips on the right and left side. Now lift the cooktop up and completely remove it from your range.
-
Pull off the burner control knobs. Using a Phillips screwdriver, take out the four screws on the burner control panel.
-
Partially open the oven door, and pull it off the hinges. Once the door is removed, place it somewhere safe. Take the top and bottom racks out of the oven.
-
Now find the sensor bulb on the oven’s back wall, and remove the bulb from the retainer clips holding it in place. Bend the old sensor bulb into a slight u-shape, and guide it through the small hole located on the rear wall of your oven. Move to the back of your appliance and guide the sensor out of the opening. Once free of the oven, straighten the sensor bulb, and push it back into the hole. Route it through the opening and pull it out of the hole on the main top panel.
-
With a Phillips screwdriver, take out the three screws on the bottom of the burner control panel. Carefully lower the control panel down and place it on the side of your stove. Locate the defective oven thermostat, and unthread the two screws holding it in place. Once the screws are out, remove the thermostat, and take off the protective splash guard covering the part. Then, detach the two wires connected to the thermostat terminals. Guide the sensor bulb under and around the other parts in the stove top until it is free of obstructions. Now you can remove the thermostat and connected sensor bulb from your appliance.
-
It is time to install the new oven thermostat. To begin, you will need to straighten the coiled sensor tube and run the sensor bulb underneath the wires running throughout your cooktop. Next, bend the sensor bulb into a slight curve before inserting it into the opening in the main top panel. Move to the rear of your appliance and continue routing the bulb through the hole that leads to the oven interior. Circle around to the front of your range and pull the sensor bulb from the opening on the back wall. Straighten the bulb, and snap it into the retaining clips.
-
After the sensor bulb is secure, move to the top of the stove and connect the thermostat wires to the thermostat terminals. Slide the splash guard onto the thermostat, and push the shaft of the thermostat through the hole on the front panel of your appliance. Reinstall the two Phillips screws that hold the thermostat in place.
-
Now that you have replaced the old oven thermostat with a new one, you can begin reassembling your range. Using the three screws you removed earlier, reattach the burner control panel. To further secure the panel, reinstall the four screws on the face of the panel, and slide the burner control knobs back on.
-
Next, put the top and bottom racks back into the range, and reconnect the oven door. Carefully lower the door onto the hinges, and then close and open it to ensure it is properly secured.
-
To reinstall the cooktop, insert the back, right hinge followed by the back left hinge. Next, pull the igniter wires through the proper holes in the panel. Once the wires are sticking out of the openings, push down on the cooktop to lock it in place. Reconnect the igniters to the igniter wires and reinstall the twelve screws that secure the cooktop to the range.
-
Place all four surface burners and burner caps back onto the cooktop. Finish off the reassembly by reinstalling the grates.
-
With your new thermostat installed and your oven reassembled, plug your range back into the wall or switch it on at the circuit breaker and turn on the gas running to your appliance. Now throw together your favorite casserole and test your oven’s baking ability.
If replacing the thermostat in your oven did not rid the appliance of its temperature inaccuracies or the oven is still not turning on or off, a faulty thermostat may not be the cause of your appliance’s malfunction. Unfortunately, there are a few other parts in your range that can bring about similar symptoms. A defective control board can lead to imprecise temperatures or an oven that won’t switch on or off. A faulty igniter can also produce identical symptoms; however, it won’t stop your appliance from shutting off. If you can’t get your oven to turn on, burnt wire connections and a damaged gas safety valve are two other possible malfunctions.
Replacing the thermostat in your GE gas oven is a repair job you can take on yourself; however, if you don’t feel completely comfortable disassembling your range or you are not positive the thermostat is the issue, please contact us today to schedule an appliance repair appointment.

Apr. 09, 2024
Eliminate the Burning Smell From Your Microwave

Apr. 09, 2024
Fixing a Samsung Freezer That Won’t Freeze

Apr. 09, 2024
Whirlpool Oven Won’t Heat: Here’s What To Do

Mar. 06, 2024
Easy Steps to Clean Your Refrigerator Coils

Mar. 06, 2024
Quick Fixes for an LG Dryer Not Heating

Mar. 06, 2024
How to Fix an Electrolux Dryer That’s Not Drying

Feb. 05, 2024
Why Is Your Whirlpool Washer Lock Light Flashing?

Feb. 05, 2024
Why Is Your Freezer Door Not Sealing?

Feb. 05, 2024
How Does a Ventless Dryer Work?

Jan. 03, 2024