June 24, 2019
Refrigerator Repair
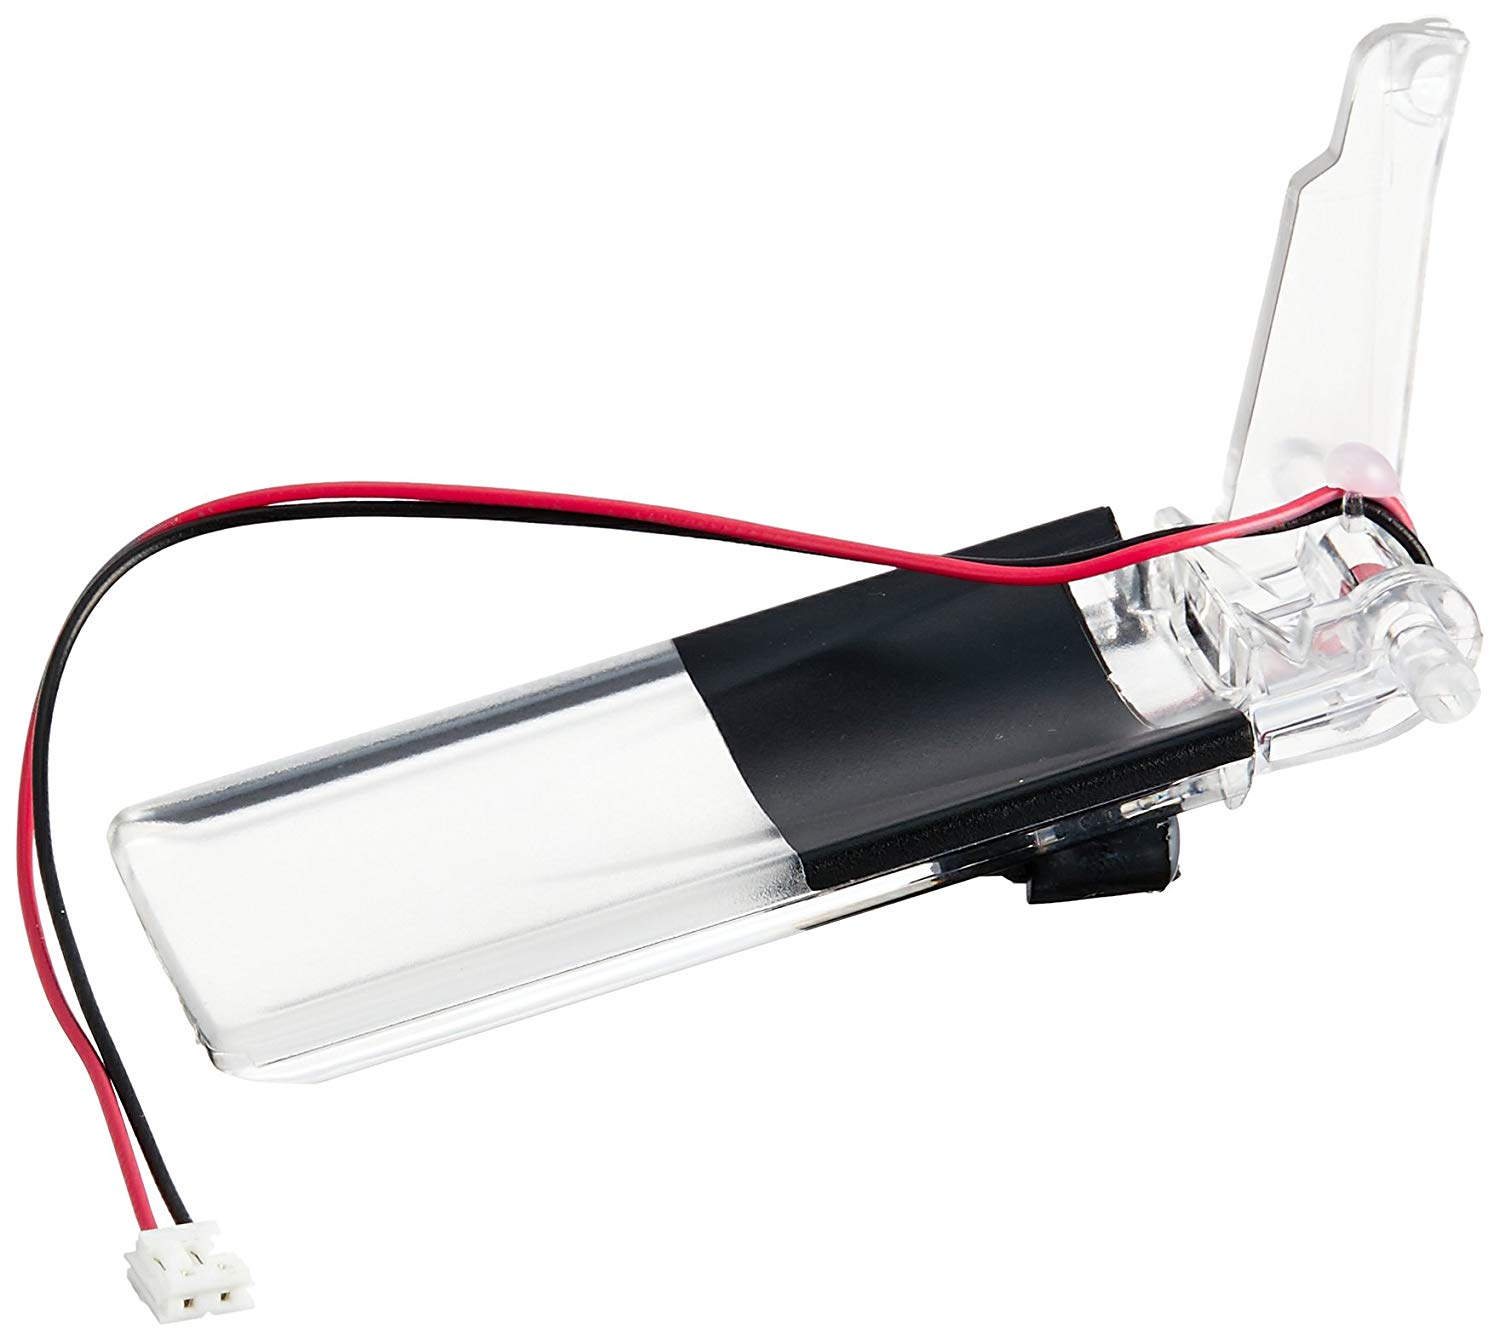
Your refrigerator’s water dispenser has a lot of moving parts. But the part that you press in with your glass to get the water receives most of the wear and damage. Eventually, that part can wear out, crack or break off. That part is called the actuator. When it breaks, order replacement part #241685703 for a new actuator. If you like DIY projects around the house, follow these steps to install it on your own.
1. Unplug your refrigerator.
Before you start disassembling the refrigerator, make sure it’s unplugged. You will be disconnected wires and accessing a circuit board, so it’s essential that you completely disconnect the power source.As an additional precaution, turn off the local water supply so water won’t leak or drip onto the parts as you work.
2. Disassemble the water dispensing assembly.
First, remove the handle to the freezer door. Open the fresh food section door to get it out of the way. Then loosen the set screws at the bottom and top of the handle to loosen it. Pull the handle away from the door and set it aside. Next, disassemble the water dispenser assembly. To start, pry away the drip tray. Underneath it, you’ll find three screws that need to be removed. Once you remove those three screws that hold the frame against the door, push the frame up to free it from the hooks along the back of the top edge. Before you set the frame aside, carefully pull free the wire ribbon from the slot in the newly revealed control board. Set the frame aside. After that, loosen the control board. Loosen the two bottom screws and center top screw that hold the bracket around the control board in place. Carefully hold the bracket so it doesn’t fall. Also remove the six screws from the control board itself, starting with the bottom screws. As you remove the top screws, the plastic shield that covers the control board will come loose. Catch it before it falls and set it aside.
The control board will stay attached by the wiring in the right corner. Instead of completely detaching the control board, just let it tilt down so you can see the water dispenser tube in the right corner. Pull the water tube up and free from the control board assembly with a pair of needle nose pliers.
Move the whole assembly to a flat work surface.
3. Remove the old water dispenser actuator.
Before you start disassembling anything, take a picture of the wire configurations along the back of the circuit board so you have a visual guide during reinstallation. Then carefully push the wire harness closest to the yellow parts from the circuit board with a flathead screwdriver. This is the LED wiring that comes attached to the new part.
Untangle the wire and set it out of the way. Next, remove the two screws along with the metal bracket that hold the dispenser actuator in place. Depress the spring that is also holding the actuator in place and then slide the actuator out of the assembly. Set it aside.
4. Install the new water dispenser actuator.
Orient the new part so the clear plastic is against the black plastic of the assembly and the tilt of the dispenser arm points toward the front of the assembly. As you’re pressing it into place, make sure both clear plastic arms click into place in their grooves.
Next, hold it in place and make sure the small arm to the right of the actuator’s right arm is also still in its groove. Place a small metal bracket over the arms and screw it in place. Also, add the metal bracket and screw over the actuator’s left arm. Set the long edge of the spring under the lever tab on the right side of the actuator.
After that, run the wiring for the LED through the hole in the assembly toward the control board. Plug the wire harness into the plug closest to the yellow parts on the control board. If you would like, use the picture you took earlier to ensure it’s in the right place.
5. Reassemble the front of the freezer door.
Before you reinstall the control assembly, cover the tip of the water tube with soapy water. This will lubricate it so it more easily slides into the dispenser assembly without using any potentially toxic chemicals. Orient the assembly to the control board is facing forward, and hold it as close as possible to the cavity in the freezer door. Hold it with your nondominant hand so you can use needlenose pliers to push the water tube into the inlet in the assembly. There’s not a lot of room to work, so this step may take a few minutes.
Once the water tube is in place, push the assembly bracket into place without pinching the wire harness on the left or pushing it behind the bracket. Hold it in place and retighten the screw along the top of the control board cavity and the two bottom screws. Next, plug in the left wire harness and carefully push the control board into place against the bracket. Make sure none of the wires are pinched. Attach the three bottom screws without reattaching the plastic shield just yet. Then line up the plastic shield so the three holes match the screw holes along the top of the circuit board and the small slice lines up with where the wire ribbon will be reinstalled. Attach it with the three small screws. Install the frame. To start, orient it so it’s facing forward and the wire ribbon is near the top. Carefully push the wire ribbon through the cut in the plastic shield and into the control board. Then align the tabs along the back of the frame with the slots and press it down into place. Also, secure it with the three screws along the bottom edge. Snap or slide the drip tray into place. The last step is reinstalling the door handle. Open the fresh food section door and set the handle in place over the pins. Hold it flush against the front of the freezer door as you tighten both the top and bottom set screws to secure it in place.
Plug the refrigerator and turn on the water supply. Fill a few cups of water to rinse away the soap lubricating the end of the water tube. For more appliance repair guides or troubleshooting tips, browse our resources at Dan Marc Appliance or contact our office for help.

Apr. 09, 2024
Eliminate the Burning Smell From Your Microwave

Apr. 09, 2024
Fixing a Samsung Freezer That Won’t Freeze

Apr. 09, 2024
Whirlpool Oven Won’t Heat: Here’s What To Do

Mar. 06, 2024
Easy Steps to Clean Your Refrigerator Coils

Mar. 06, 2024
Quick Fixes for an LG Dryer Not Heating

Mar. 06, 2024
How to Fix an Electrolux Dryer That’s Not Drying

Feb. 05, 2024
Why Is Your Whirlpool Washer Lock Light Flashing?

Feb. 05, 2024
Why Is Your Freezer Door Not Sealing?

Feb. 05, 2024
How Does a Ventless Dryer Work?

Jan. 03, 2024