March 11, 2019
Refrigerator Repair
If your freezer is too warm and your frozen food is starting to thaw, there’s a short list of potential problems. Before you start replacing any parts, try changing the setting. If that doesn’t work, the evaporator fan motor may be faulty. These parts can short or break, especially after they’re overworked. Order replacement #DA31-00146E for a new refrigerator evaporator fan motor for your Samsung refrigerator. Then follow these steps to replace the broken part yourself:
1. Unplug the refrigerator.
Before you start repairing any appliance, make sure it’s completely separated from its power source. This keeps you and the appliance safe. When you’re replacing the evaporator fan motor, you will be unplugging wires, so it’s even more essential that you unplug the refrigerator first.
2. Access and remove the back panel of the freezer section.
Open the freezer door and remove the drawer. To remove the drawer, push the drawer railings in and tilt the drawer up. Pull the drawer out and set it aside.
Also, remove the connector rod toward the back of the rails. This is designed to help the freezer drawer keep its shape. To remove it, push the rail to the right to the left end falls free of the cutout holding it in place. Then slide the right it out and set the rod aside. Remove the ice maker next. To start, remove the plastic front cover by unsnapping it from its mounting tabs. Remove the two screws under the cover that secure the ice maker box to the top of the section. Pull the ice maker forward to unhook it and hold it a few inches below the ceiling. Before you pull it away completely, unhook the wire harness by hand
After that, remove the back panel. Remove the two screws — one on either side of the panel — in the depressions. Then tug the back panel free until you can reach behind one of the corners and pull it slightly further forward. Before you pull the back panel out entirely. Release the three wire harnesses in the top right corner. If you’re nervous about unplugging the wires and plugging them back in the correct orientation, all three are designed to only fit in one way. You can also take a picture with your phone so you have a guide during reinstallation
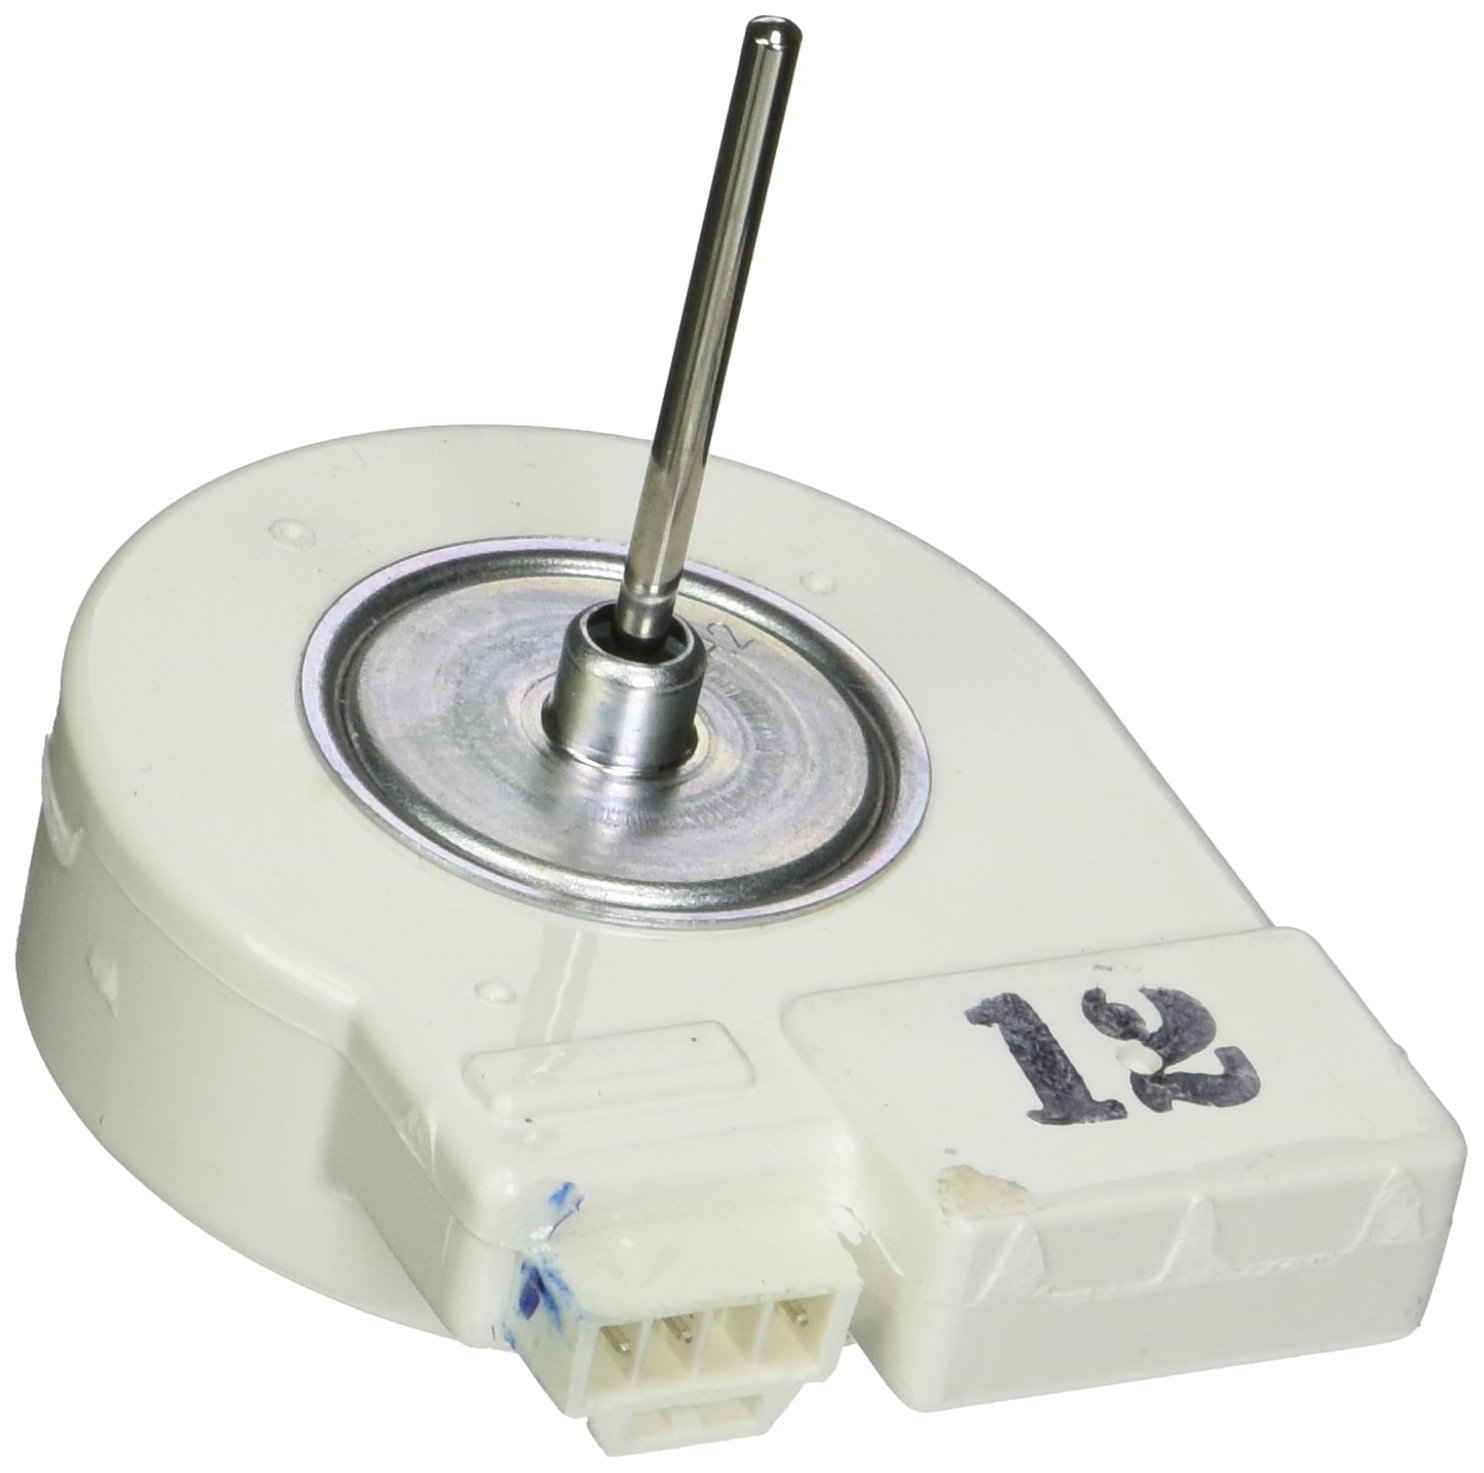
3. Remove the old evaporator fan motor.
Flip the back panel over so you can see the motor assembly. Remove the four screws that hold the assembly against the panel. After that, flip the assembly over and pry out the fan by hand. Then set it back in position. Next, remove the screw holding the motor cover against the assembly. You will also need to disengage the locking tabs around the edge of the cover with a flathead screwdriver.
Once the motor cover is off, start removing parts to isolate the motor. First, remove the black grommet. Then remove the motor itself. Underneath it on the bottom shaft, there will be another black grommet. Remove it. Press down the locking tab on the wire harness and remove it, too.
4. Install the new evaporator fan motor.
Follow the uninstallation steps in reverse to install the new part
After that, flip the assembly over, slide the fan over the shaft, and flip the assembly back into position. Retighten all four screws to hold it back in place against the panel.
5. Reinstall the back panel.
Orient the back panel so the exterior side is facing you as you slide it back into the freezer section. Before you press it flush with the back of the refrigerator, reattach the wiring. Plug the three wire harnesses back into the top right corner. Refer to the picture you took earlier as needed
6. Reassemble the freezer section.
First, reinstall the icemaker. Hold it up near the top of the freezer section and plug in the wire harness. Slide it over the fill tube and then stick
Next, attach the connector rod. Line up the wheels on the rails. Stick the right end into the rail wheel and then the left one. Then attach the door. Hold the door against the rails and then push each rail into the cutouts. secure the rails in place with the bolts you removed at the beginning
Orient the drawer with its rails extended and to the back. Slide them into the grooves on each side of the freezer section near the ceiling. Make sure the drawer and door close and open smoothly

Apr. 09, 2024
Eliminate the Burning Smell From Your Microwave

Apr. 09, 2024
Fixing a Samsung Freezer That Won’t Freeze

Apr. 09, 2024
Whirlpool Oven Won’t Heat: Here’s What To Do

Mar. 06, 2024
Easy Steps to Clean Your Refrigerator Coils

Mar. 06, 2024
Quick Fixes for an LG Dryer Not Heating

Mar. 06, 2024
How to Fix an Electrolux Dryer That’s Not Drying

Feb. 05, 2024
Why Is Your Whirlpool Washer Lock Light Flashing?

Feb. 05, 2024
Why Is Your Freezer Door Not Sealing?

Feb. 05, 2024
How Does a Ventless Dryer Work?

Jan. 03, 2024