June 13, 2019
Washer Repair
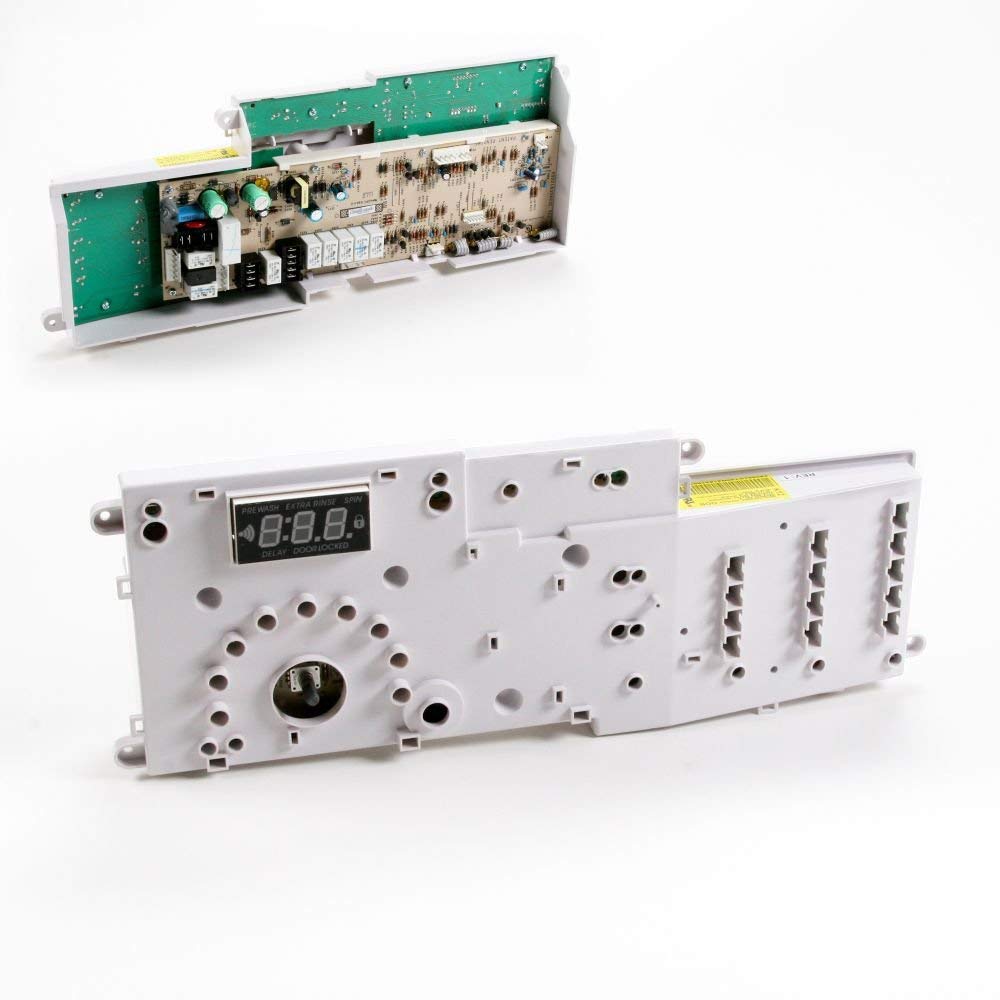
The control board is the central control for all of your GE washer’s functions. The switches, dials, and knobs all connect to the control board. If it shorts out or gets damaged, your machine will start to lose functionality or will stop working entirely. Models with a digital readout can also display an error code telling you when the control board has stopped working. If you like fixing your own appliances, this is a repair you can make yourself. Order replacement part #WH12X10468 for most GE washer models. Then follow these steps to uninstall and replace the old control board.
1. Unplug the washing machine.
This is the first step to any appliance repair project. Once you have identified what’s wrong with your washer, make sure you unplug it completely so you stay safe from electrical discharge and shock.
2. Disassemble the washer.
Pull the washer away from the wall. You only need enough room to slide the top access panel back. If you have room, try to pull the washer away from the wall as little as possible so you don’t have to detach the hoses or turn off the water.
Remove the three screws along the back edge of the top access panel and the three screws along the back of the trim next to the control panel. Then you can pull the top panel an inch back, which loosens the hold on the front trim piece. Carefully pry the trim free of the tabs and set it aside. Lift the top panel’s back edge up and then set the whole panel aside.
Remove the control panel next. To start, pull out the detergent drawer in the left-hand side and depress the clip at the back of the drawer so you can remove it entirely. Set it aside. Remove the screw next to the detergent drawer housing. Next, remove the screws along the back of the control panel console. Also, pry up the top edge of the console to loosen the control panel. Hold onto the control panel and press the two locking tabs on the back of the console inside the washer. Once it comes free, don’t pull it away or let it fall. Instead, tilt it down so you can start to unplug the wires.
You will need to disconnect all of the wire harnesses connected to the control panel. All you have to do is press down the tab on each plug. You don’t have to worry about mixing them up during reinstallation because each plug has a unique shape. However, if you’re nervous about working with wiring, take a picture from multiple angles so you have a visual guide of where each wire harness should go.
Once the control panel is completely detached from the washer, move it to a work surface. This is the part that houses the control board.
3. Remove the old control board.
Leave the control panel face down. Remove the screws along the perimeter of the control board. There should be four. Also, depress the locking tabs along the edge of the control board closest to the curving edge of the control panel. These can be difficult to reach, so use a flathead screwdriver to move the tabs. Pull the control board out and shift the control panel aside.
Flip the control board over. Take a picture of all the buttons of the front side of the control board so you have a visual guide during reinstallation. Then start removing all of the buttons and assemblies so you can move them over to the new part. They should be relatively loose, so don’t apply too much force on the thin plastic parts.
4. Install the new control board.
Before you put the new control board part in the control panel console, install all of the buttons you removed from the old part. The longer assemblies will often have hooks that need to be slid into the cutouts on the control board to provide extra stability. Make sure each of the buttons is installed so they match the picture guide.
Once the buttons are all in place, pick up the control board and tilt it so it’s almost perpendicular to the ground. Line up the control board’s shaft with the hole in the control panel. As you do so, wiggle the knob a bit so the shaft aligns with the hole and snaps completely into place. The control panel helps hold the buttons in place, but if you tilt the control board too far forward during this step, some of the buttons may come loose. if anything falls out of place, just reinsert the hooks and try again.
Once the control board shaft is in place, carefully keep both pieces held together and set the control panel face down. Now you can lock the two pieces together by gently pressing the three locking tabs into place and retightening the four screws around the edge of the control board.
5. Reassemble the washer.
First, orient the control board assembly next to the top of the front of the washer so the curved edge is closest to the machine. Start plugging the wire harnesses into the control board by following the picture guide or by matching each wire harness to the correct plug.
Next, tilt the control panel back up so it’s flush with the top front of the washer, and make sure none of the wires get pinched. Slide the tabs along the bottom into the slots on the right corner, and snap the control panel into place. After that, retighten the screw that sits next to the detergent drawer housing. Also, retighten the screws along the back of the control panel. Then slide the detergent drawer into place and reattach the top access panel. If you look at the bottom of the top access panel, you’ll notice slots for the circular pins along the rail. The pins need to go through the larger end of the cutout so the panel lies flat and then, when you slide the panel forward, lock into place against the smaller portion of the cutout. This part can be tricky, so a visual guide like at the end of this video may help.
To do this, set the top access panel carefully on top of the frame and the pins. It should hand approximately an inch off the back. Before you slide the panel forward, press the trim into place on the three locking tabs. Then slide the panel forward and add back all six screws to hold it in place.
Push your washer back into place and plug it in. Follow the guide that came with the control board to program the washer. Each model has a slightly different step. Once your washer has been programmed, it’s ready to start a new cycle.
Go to Dan Marc Appliance for more repair guides or to talk to an experienced technician.

Apr. 09, 2024
Eliminate the Burning Smell From Your Microwave

Apr. 09, 2024
Fixing a Samsung Freezer That Won’t Freeze

Apr. 09, 2024
Whirlpool Oven Won’t Heat: Here’s What To Do

Mar. 06, 2024
Easy Steps to Clean Your Refrigerator Coils

Mar. 06, 2024
Quick Fixes for an LG Dryer Not Heating

Mar. 06, 2024
How to Fix an Electrolux Dryer That’s Not Drying

Feb. 05, 2024
Why Is Your Whirlpool Washer Lock Light Flashing?

Feb. 05, 2024
Why Is Your Freezer Door Not Sealing?

Feb. 05, 2024
How Does a Ventless Dryer Work?

Jan. 03, 2024