October 2, 2023
Dryer Repair
Drying machines are staple appliances in nearly every household. They help us avoid hanging wet clothes out to dry or around the home, allowing us to complete our laundry chores with ease. However, dryer vents require regular cleaning to continue operating efficiently and safely.
Accumulated lint, debris, and moisture can cause clogging or—even worse—lead to a house fire. In this article, we’ll guide you through the process of cleaning a dryer vent properly.
Why you should clean your dryer vent
Cleaning your dryer vent is a crucial task that often gets ignored, but it plays an important role in maintaining the lifespan of your dryer and keeping your home safe.
As lint accumulates in the dryer vent, it blocks airflow, causing the dryer to work harder to expel hot air and lint. This not only increases energy consumption, potentially leading to higher electricity bills, but also causes your dryer to wear out more quickly.
More importantly, a clogged dryer vent poses a serious fire hazard. The hot air flowing through the vent can ignite the excess lint and start a fire.
How to clean your dryer vent
1. Disconnect the dryer vent
The very first step is to locate the dryer vent. The dryer vent is typically found at the back of the dryer. It’s a round duct that connects the dryer to the outside of your house, facilitating the expulsion of hot, moist air generated during the drying process.
Before you start, make sure the dryer is unplugged to avoid any accidental mishaps. Use a screwdriver or a pair of pliers to loosen the clamp that attaches the vent to the dryer. Once the clamp is loosened, you can easily slide the vent off the dryer’s exhaust port.
With the vent hose detached, inspect it for any signs of lint buildup or blockages. If the hose appears damaged or excessively clogged, it may be best to replace it altogether.
If the hose is in good condition, proceed to remove the lint. You can use a vacuum cleaner with a long hose attachment to suck out the lint. Alternatively, a long-handled brush can be used to dislodge and remove the lint manually.
2. Use a vacuum cleaner or brush
Removing lint from the vent hose is a critical part of dryer maintenance. Lint buildup can restrict airflow, causing your dryer to work harder than necessary, which could lead to increased energy consumption and potential fire hazards.
Start by stretching out the vent hose so you can inspect its whole length. Use a flashlight if necessary to get a good look inside. If you notice an excess amount of lint buildup, you’ll need to clean it out.
One of the most effective ways to remove lint is by using a vacuum cleaner with a long hose attachment. Insert the hose into the vent and slowly move it back and forth to suck out the lint. Be careful not to push the lint further into the vent or stretch the vent with the vacuum hose.
If your vacuum hose can’t reach all the way through, or if there’s stubborn lint that won’t come loose, you can use a long-handled brush to dislodge and remove the lint. Make sure the brush is flexible enough to navigate through the bends in the hose. These long brushes are typically found in lint dryer cleaner kits.
Remember to clean both ends of the hose and recheck the interior to ensure all lint has been removed.
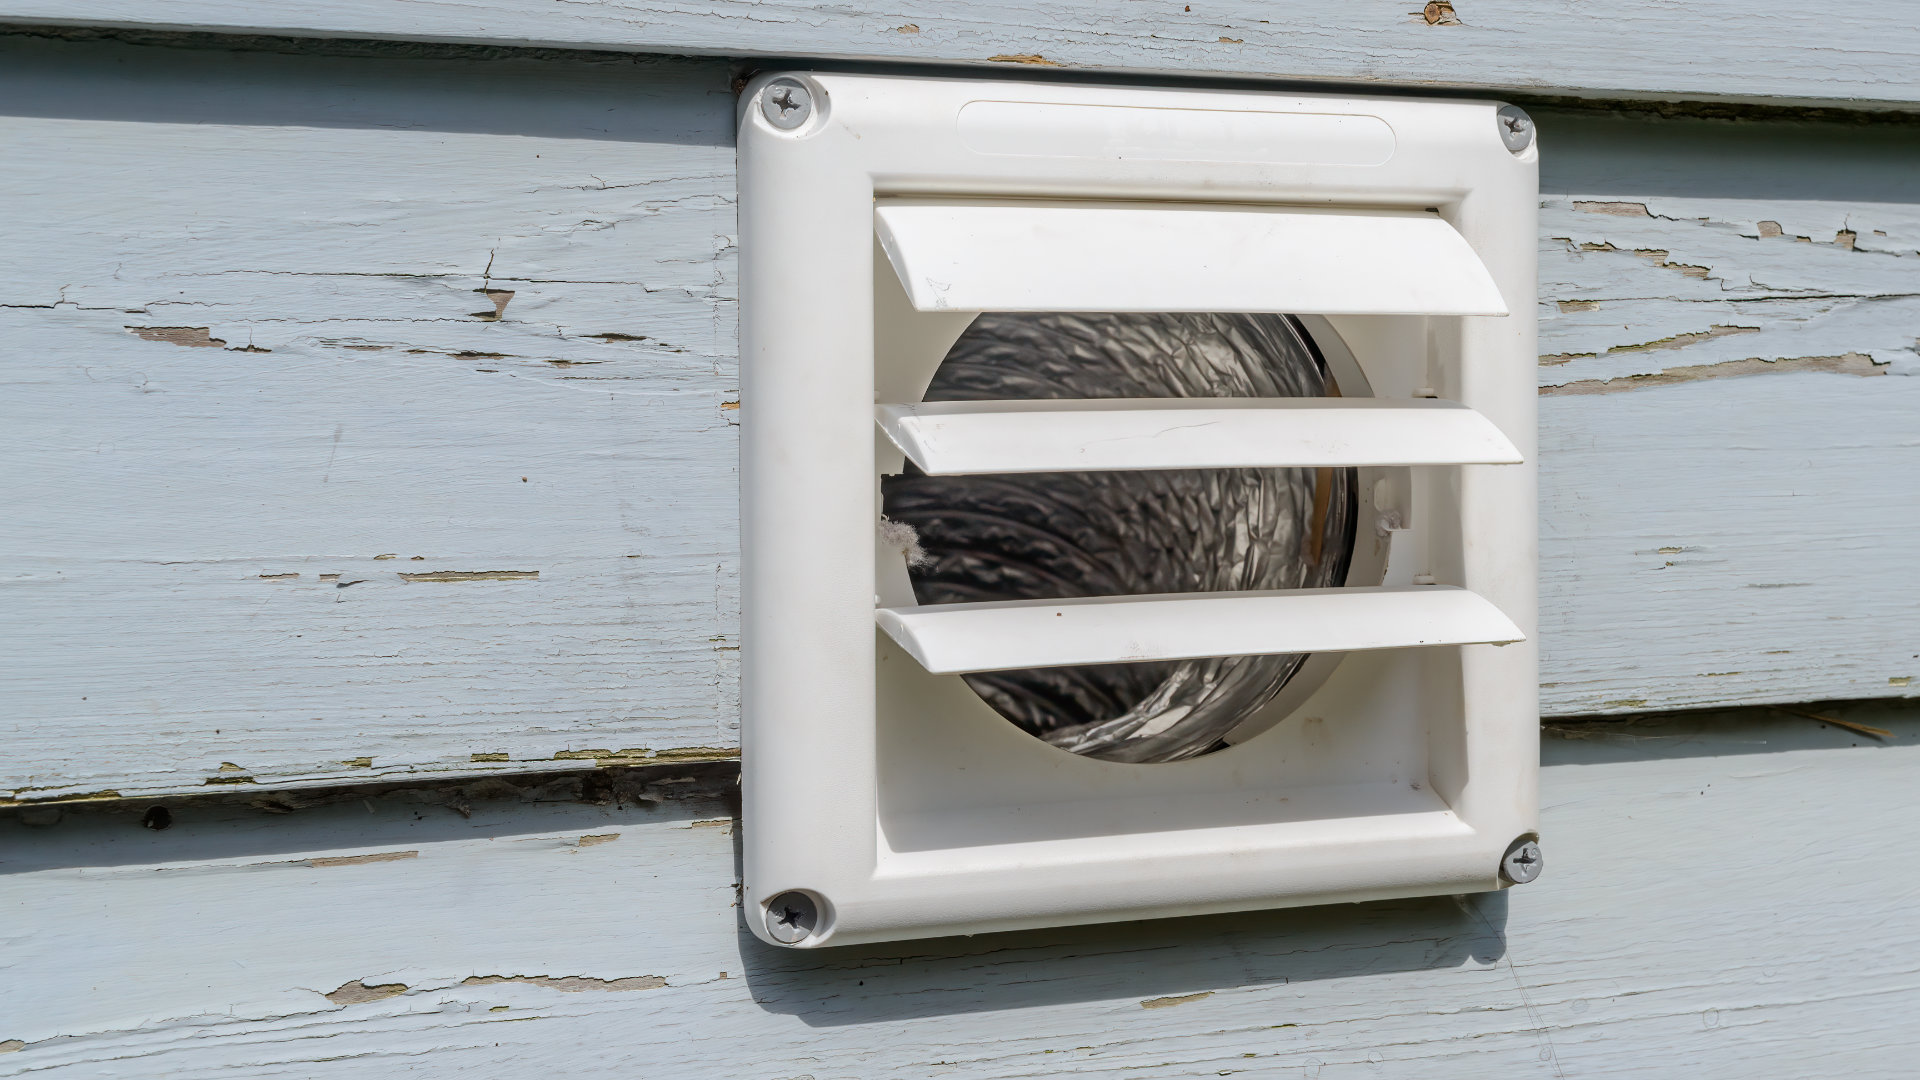
3. Check and clean the external vent
The external vent, also known as the vent cap, is located on the outside of your home where the dryer vents to the outdoors. Over time, this vent can also accumulate lint, leading to blockages and reduced dryer efficiency.
To clean the external vent, you’ll first need to locate it on the outside of your house. It’s usually a round flap or louvered cover. Make sure to check it regularly for any signs of damage or blockage.
Open the cover and use your vacuum or brush to remove any lint buildup. If the vent cover is high up or hard to reach, you might need a ladder. Always prioritize safety when using a ladder or climbing on any part of your home.
After cleaning, inspect the vent cover to ensure it’s not damaged and that it opens and closes properly. A faulty vent cover can let cold air into your home and allow pests to enter.
4. Reconnect the dryer vent
Start by aligning the end of the vent hose with the dryer’s exhaust port. The end of the hose and the port should match up exactly, allowing for a seamless connection.
Once aligned, slide the vent hose onto the dryer’s exhaust port. Push it in as far as it will go to ensure a secure fit. The hose should fit snugly onto the port without any gaps or loose areas.
After attaching the hose, you need to secure it to prevent it from coming loose. This is typically done using a clamp that fits around the circumference of the hose where it connects to the dryer. If your clamp is a screw-type, tighten the screw until the hose is held firmly in place. If it’s a tension clamp, squeeze it with pliers to tighten it.
Once secured, give the hose a gentle tug to make sure it’s firmly attached. It should stay in place and not come off easily. If it does, you may need to tighten the clamp a bit more.
Using the same process, reconnect the other end of the vent hose to the external vent. Again, make sure it’s secure and won’t come loose.
With everything connected, do a final check to ensure all is in order. Make sure there are no kinks or sharp bends in the vent hose, as these can restrict airflow and lead to problems down the line.
Cleaning your dryer vent is a vital yet often overlooked task. A faulty dryer vent can affect the efficiency of your dryer machine and in some cases cause fires. You should clean your dryer vent every six months, once a year, or more frequently if you have pets or use your dryer machine heavily.
These steps on how to clean a dryer vent properly will help you keep your dryer working safely and effectively, avoid any hazards to you, your family, or your home, and ensure a clean and pleasant environment.

Apr. 09, 2024
Eliminate the Burning Smell From Your Microwave

Apr. 09, 2024
Fixing a Samsung Freezer That Won’t Freeze

Apr. 09, 2024
Whirlpool Oven Won’t Heat: Here’s What To Do

Mar. 06, 2024
Easy Steps to Clean Your Refrigerator Coils

Mar. 06, 2024
Quick Fixes for an LG Dryer Not Heating

Mar. 06, 2024
How to Fix an Electrolux Dryer That’s Not Drying

Feb. 05, 2024
Why Is Your Whirlpool Washer Lock Light Flashing?

Feb. 05, 2024
Why Is Your Freezer Door Not Sealing?

Feb. 05, 2024
How Does a Ventless Dryer Work?

Jan. 03, 2024